
'board_android-IoT/Mango64'에 해당되는 글 5건
- 2012.04.08 :: MANGO64_u-boot_kernel_RootFs-Qt-PORTING-GUIDE
- 2012.04.05 :: 망고 WiFi/BT 모듈 보드 판매(AP기능지원)
- 2012.02.01 :: Mango64-linux-Qt-porting
- 2011.11.13 :: uBoot 환경설정 및 사용법
- 2011.10.25 :: Qt 4.7 Compiler for ARM
MANGO64_u-boot_kernel_RootFs-Qt-PORTING-GUIDE
- http://www.jkelec.co.kr/img/arm/arm11/s3c6410_startkit/man/s3c6410_startkit_linux2.6.36_developer.html 참고로 mango64에 맞게 수정예정.
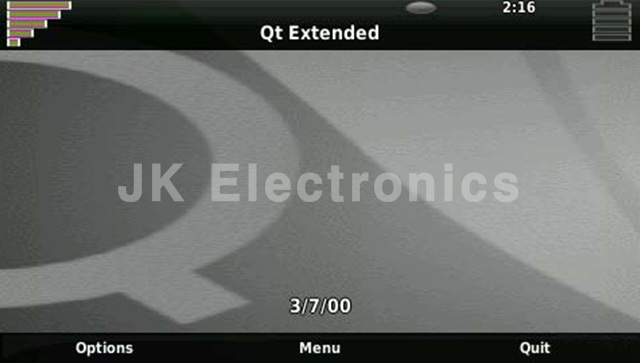
- Qt4 포팅이 망고64에 포함이 안되서 그부분 변경예정
S3C6410 Start Kit Linux Developer Guide | |||
* Update history - 2011.1.13 : 초기 Release | |||
S3C6410 Startkit 의 모든 예제와 컴파일 과정은 VMWare에 설치된 Fedora9 머신에서 실행 하였습니다. 다른 리눅스 환경에서는 테스트 되지 않았습니다. 폐도라 리눅스의 전체 설치 과정은 여기Installation Fedora9 을 참조하시기 바랍니다.
| |||


'board_android-IoT > Mango64' 카테고리의 다른 글
| 망고 WiFi/BT 모듈 보드 판매(AP기능지원) (0) | 2012.04.05 |
|---|---|
| Mango64-linux-Qt-porting (0) | 2012.02.01 |
| uBoot 환경설정 및 사용법 (0) | 2011.11.13 |
| Qt 4.7 Compiler for ARM (0) | 2011.10.25 |
망고 WiFi/BT 모듈 보드 판매(AP기능지원
http://cafe.naver.com/embeddedcrazyboys/12338
[공구]망고 WiFi/BT 모듈 보드 판매(AP기능지원
| MANGO64_u-boot_kernel_RootFs-Qt-PORTING-GUIDE (0) | 2012.04.08 |
|---|---|
| Mango64-linux-Qt-porting (0) | 2012.02.01 |
| uBoot 환경설정 및 사용법 (0) | 2011.11.13 |
| Qt 4.7 Compiler for ARM (0) | 2011.10.25 |
링크: http://cskimair.tistory.com/entry/Mango64-linux-qt-porting
*. 아래 내용은 "MangoStory 5-안드로이드 시스템 프로그래밍 완전정복"를 기본으로 작성된 내용입니다.
- 개발환경 설정 및 커널 빌드등의 환경설정방법을 참고한 것입니다.
가능하면 책내용과 유사하도록 하고 책에서는 ubuntu9버젼이 기준이나
Ubuntu9버젼은 지원이 종료되면서 Ubuntu10.04에서 업데이트 되면서
이문서 역시 우분투10.04버젼에서 돌아가는 것을 기준으로 하였습니다.
0.tftp_nfs_etc 설정
- 아래와 같은 디렉토리에 uboot prompt 에서 print한 내용을 파일로 저장해놨습니다.
|
kra@ubuntu:~$ cd 00.tftp_nfs_etc |
보드(스마트박스)를 부팅하면 아래와 같은 화면이 나옵니다. 이때 시리얼 콘솔화면에서 키보드를 치면
프롬프트(MANGO64#)가 나옵니다.
|
U-Boot 1.3.4 (Sep 19 2011 - 01:21:21) for MANGO64 uboot-1.3.4-pooh11
|
print 명령을 입력하면 아래와 같은 내용이 출력됩니다.
아래에서 bootcmd 가 중요하나 초기 설정후 변경할일이 없습니다.
bootargs가 nfs로 부팅하거나 nand로 부팅할때 설정을 바꾸면서 사용하게 됩니다.
bootargs_nfs , bootargs_nand 등의 파라메터는 정보를 임시 저장하기 위한 파라메터입니다.
|
MANGO64 # print Environment size: 981/16380 bytes |
환경변수의 변경방법은 아래와 같습니다. ""사이에는 한줄입니다.
| MANGO64 # setenv bootargs "root=/dev/nfs rw nfsroot=192.168.11.131:/home/kra/nfsroot/RootFS-NEW2 ,nolock,tcp ip=192.168.11.110::192.168.11.1:255.255.255.0:mango64_bd:eth0:off mem=128M console=ttySAC1,115200" |
디렉토리의 구성은 아래와 같이 00~09로 심볼릭 링크를 걸어놓았습니다.
| kra@ubuntu:~$ ls -al total 276 drwxr-xr-x 46 yhoh yhoh 4096 2012-01-30 21:09 . drwxr-xr-x 4 root root 4096 2012-01-29 15:04 .. lrwxrwxrwx 1 yhoh yhoh 28 2012-01-30 13:44 00.tftp_nfs_etc -> mango-developing-environment lrwxrwxrwx 1 yhoh yhoh 25 2012-02-01 23:32 01.uboot -> mango64-u-boot-2010-0816/ lrwxrwxrwx 1 yhoh yhoh 26 2012-01-29 23:52 02.kernel -> mango64_kernel_2010_07_02/ lrwxrwxrwx 1 yhoh yhoh 33 2012-01-29 23:52 03.rootfs -> dhkim1027-mango64_rootfs-6501333/ lrwxrwxrwx 1 yhoh yhoh 5 2012-01-29 23:53 04.tslib -> tslib lrwxrwxrwx 1 yhoh yhoh 38 2012-01-30 00:13 05.qt4.7 -> qt-everywhere-opensource-src-4.7.0-rc1 lrwxrwxrwx 1 yhoh yhoh 18 2012-01-30 20:49 06.sound -> alsa-sound.1.0.15/ lrwxrwxrwx 1 yhoh yhoh 8 2012-01-30 20:18 07.mango64-test -> m64led8/ |
1. uboot 컴파일
- uboot 디렉토리로 이동합니다.
| kra@ubuntu:~$ cd 01.uboot kra@ubuntu:~/01.uboot$ make clobber kra@ubuntu:~/01.uboot$ make smdk6410_config Configuring for smdk6410 board... kra@ubuntu:~/01.uboot$ make |
1.1 u-boot.bin 보드로 다운로드
위에서 생성된 ~/01.uboot/u-boot.bin 파일을 이용해서 윈도우 환경에서 스마트박스(망고64)보드에 다운로드해줍니다.
("안드로이드 시스템 프로그래밍 완전정복, 144페이지 참고)
2. kernel 컴파일
- .config 의 파일이 있으나 수정할필요는 없고 현재 설정이 최종입니다. 커널 빌드후 커널을 tftpboot폴더로 복사합니다.
| kra@ubuntu:~/02.kernel$ make kra@ubuntu:~/02.kernel$ cp arch/arm/boot/zImage ~/tftpboot/zImage |
|
1 # /etc/default/tftpd-hpa
2 TFTP_USERNAME="nobody"
3 TFTP_DIRECTORY="/home/kra/tftpboot"
4 TFTP_ADDRESS="0.0.0.0:69"
5 TFTP_OPTIONS="--secure" |
- tftp 의 테스트는 아래의 스크립트와 같이 수행해줍니다.
|
kra@ubuntu:~/tftpboot$ cat test.txt Hello, This is a test file. kra@ubuntu:~/tftpboot$ cd .. kra@ubuntu:~$ tftp localhost tftp> get test.txt tftp> bye ?Invalid command tftp> quit kra@ubuntu:~$ cat test.txt Hello, This is a test file. |
*. ("안드로이드 시스템 프로그래밍 완전정복, 113페이지, "7.2.1 TFTP - Ethernet Downloading server 설치" 참고)
2.1 zImage 다운로드
- "안드로이드 시스템 프로그래밍 완전정복, 157페이지, "11.3 Kernel 다운로드 후 NAND 저장 및 부팅"를 참고해주세요.
3.root file system 컴파일
- http://iggeak.tistory.com/15 을 참고로해서 루트파일 시스템을 만들어 줍니다.
/home/kra/nfsroot/RootFS-NEW2 폴더를 위주로 작업했습니다.
- 아래의 폴더에서 make 를 실행해줍니다.
| kra@ubuntu:~/03.rootfs$ ll total 24 drwxr-xr-x 12 kra kra 4096 2011-09-27 20:05 bash-4.1 drwxr-xr-x 32 kra kra 4096 2012-03-24 11:58 busybox-1.17.0 -rwxr-xr-x 1 kra kra 110 2012-02-02 10:12 compile-rootfs.sh -rw-r--r-- 1 kra kra 1223 2010-07-24 15:40 Makefile drwxr-xr-x 8 kra kra 4096 2011-09-27 19:46 sysvinit-2.88dsf drwxr-xr-x 4 kra kra 4096 2010-07-24 15:40 target kra@ubuntu:~/03.rootfs$ |
3.1 nfs export 폴더 확인
- cat /etc/exports 를 실행해봅니다.
- 아래처럼 파일에서 /home/kra/nfsroot 폴더가 포함되어 있는지 확인합니다.
| kra@ubuntu:~/03.rootfs$ cd .. kra@ubuntu:~$ cat /etc/exports # /etc/exports: the access control list for filesystems which may be exported # to NFS clients. See exports(5). # # Example for NFSv2 and NFSv3: # /srv/homes hostname1(rw,sync,no_subtree_check) hostname2(ro,sync,no_subtree_check) # # Example for NFSv4: # /srv/nfs4 gss/krb5i(rw,sync,fsid=0,crossmnt,no_subtree_check) # /srv/nfs4/homes gss/krb5i(rw,sync,no_subtree_check) # /home/kra/nfsroot *(rw,no_root_squash,no_all_squash,sync) /home/yhoh/nfsroot *(rw,no_root_squash,no_all_squash,sync) /nfsroot *(rw,no_root_squash,no_all_squash,sync) kra@ubuntu:~$ |
- MANGO64 프롬프트에서 환경변수를 확인합니다.
bootcmd=nand read 50008000 40000 300000; bootm 50008000
gatewayip=192.168.11.1
netmask=255.255.255.0
ipaddr=192.168.11.110
serverip=192.168.11.131
stdin=serial
stdout=serial
stderr=serial
- 아래와 같이 MANGO64 # 상태에서 환경변수를 바꿔줍니다. (nand 에서 부팅하도록 합니다.
| MANGO64 # setenv bootargs "root=/dev/mtdblock2 rootfstype=yaffs2 console=ttySAC1,115200" MANGO64 # print bootargs bootargs=root=/dev/mtdblock2 rootfstype=yaffs2 console=ttySAC1,115200 MANGO64 # |
3.2 스마트박스의 부트설정
- 아래와 같은 설정을 확인합니다.
| bootcmd=nand read 50008000 40000 300000; bootm 50008000 bootargs_nand=root=/dev/mtdblock2 rootfstype=yaffs2 console=ttySAC1,115200 bootargs_android_nfs=root=/dev/nfs rw nfsroot=192.168.11.131:/home/kra/nfsroot/m ango64_android,nolock,tcp ip=192.168.11.110::192.168.11.1:255.255.255.0:mango64_ bd:eth0:off mem=128M init=/init console=ttySAC1,115200 bootargs_nfs=root=/dev/nfs rw nfsroot=192.168.11.131:/home/kra/nfsroot/RootFS-NE W2 ,nolock,tcp ip=192.168.11.110::192.168.11.1:255.255.255.0:mango64_bd:eth0: off mem=128M console=ttySAC1,115200 bootargs=root=/dev/nfs rw nfsroot=192.168.11.131:/home/kra/nfsroot/RootFS-NEW2, nolock,tcp ip=192.168.11.110::192.168.11.1:255.255.255.0:mango64_bd:eth0:off mem =128M console=ttySAC1,115200 filesize=2FD9C4 fileaddr=51000000 gatewayip=192.168.11.1 netmask=255.255.255.0 ipaddr=192.168.11.110 serverip=192.168.11.131 stdin=serial stdout=serial stderr=serial |
위 설정에서 bootargs_nand 는 bootargs 로 바꿔주면 nand 에서 부팅하게 설정이 바뀝니다.
또, bootargs_nfs를 bootargs 로 바꿔주면 nfs(network file system)을 통해서 부팅하도록 설정이 바뀝니다.
- 아래와 같이 환경변수를 바꿔줍니다. (nand에서 부팅하고 root filesystem은 yaffs2 라고 지정합니다.
| MANGO64 # setenv bootargs="root=/dev/mtdblock2 rootfstype=yaffs2 console=ttySAC1,115200" |
3.3 루트파일 시스템 생성
아래와 같이 스크립트를 수행해줍니다.
|
kra@ubuntu:~/nfsroot$ cd /home/kra/nfsroot/ |
| kra@ubuntu:~/nfsroot$ ll total 67656 drwxrwxrwx 2 kra kra 4096 2011-11-10 16:10 bkup -rwxrwxrwx 1 kra kra 1355216 2011-11-09 15:07 busybox -rwxrwxrwx 1 root root 149762 2011-12-11 16:31 libertas_sdio.ko drwxrwxrwx 19 root root 4096 2012-01-01 10:47 mango64_android -rwxrwxrwx 1 kra kra 293 2011-11-10 14:25 mk_smartbox-mango64.yaffs2.txt drwxrwxrwx 9 kra kra 4096 2011-10-29 01:45 nfs-temp drwxrwxrwx 18 kra kra 4096 2011-11-02 15:04 old.RootFS lrwxrwxrwx 1 kra kra 11 2012-01-06 20:08 RootFS -> RootFS-NEW2 drwxrwxrwx 17 root root 4096 2011-12-02 11:02 RootFS-NEW drwxrwxrwx 21 root root 4096 2011-12-31 12:08 RootFS-NEW2 lrwxrwxrwx 1 kra kra 34 2011-10-28 16:29 RootFS-NEW.tar -> /home/kra/Downloads/RootFS-NEW.tar drwxrwxrwx 5 kra kra 4096 2011-11-09 14:59 RootFS.old -rwxrwxrwx 1 kra kra 1361920 2011-11-09 17:08 rtc-busybox-1109.tar drwxrwxrwx 3 root root 4096 2011-11-11 19:58 sd -rwxrwxrwx 1 root root 66046464 2011-11-09 22:07 smartbox-mango64-1108.yaffs2 drwxrwxrwx 3 root root 4096 2011-10-24 19:59 tslib-arm -rwxrwxrwx 1 kra kra 317440 2011-12-30 23:51 tslib.tar kra@ubuntu:~/nfsroot$ cat mk_smartbox-mango64.yaffs2.txt kra@ubuntu:~/nfsroot$ history | grep smartbox 671 sudo mkyaffs2image RootFS-NEW2 smartbox-mango64.yaffs2 673 sudo chmod 755 smartbox-mango64.yaffs2 680 cp smartbox-mango64.yaffs2 /home/kra/tftpboot/. 864 history | grep smartbox kra@ubuntu:~/nfsroot$ pwd /home/kra/nfsroot |
- 파일시스템 스마트박스에 다운로드 하기
- "안드로이드 시스템 프로그래밍 완전정복, 161페이지, "11.4 ... 및 루트파일시스템 생성"를 참고해주세요.
| 이부분은 다른 루트파일시스템 생성등을 참조하였고 smartbox에 yaffs2 이미지를 업로드하는 부분만 참고하였습니다. 따라서, 위에 언급한 책의 161페이지를 참조해주시기 바랍니다. smartbox-mango64.yaffs2 파일을 루트파일시스템으로 만들었고 /home/kra/nfsroot/RootFS-NEW2 디렉토리를 기본 디렉토리로 하였습니다. yaffs2파일 시스템은 아래와 같이 명령을 입력해주었습니다. kra@ubuntu:~/nfsroot$ sudo mkyaffs2image RootFS-NEW2 smartbox-mango64.yaffs2 또, 아래와 같이 속성변경 및 파일을 이동해주었습니다. kra@ubuntu:~/nfsroot$ sudo chmod 755 smartbox-mango64.yaffs2 kra@ubuntu:~/nfsroot$ cp smartbox-mango64.yaffs2 /home/kra/tftpboot/. |
- 아래처럼 nand에 저장할 영역을 지워줍니다.
| MANGO64 # nand erase 400000 8000000
NAND erase: device 0 offset 0x400000, size 0x8000000 |
- 아래와 같이 tftp로 yaffs2 로 구성된 파일시스템을 다운로드합니다.
| MANGO64 # tftp 51000000 smartbox-mango64.yaffs2 ...... ################################################################# ################################################################# ############### done Bytes transferred = 66046464 (0x3efca00) MANGO64 # |
- 아래와 같이 nand에 write해줍니다.
|
MANGO64 # nand write.yaffs 51000000 400000 0x3efca00 Writing data at 0x4113800 -- 100% complete. |
- 이제 스마트박스를 부팅해줍니다. (저장이 안되는 경우가 있으므로 저장을 두번해주고 부팅해줍니다.)
| MANGO64 # save Saving Environment to NAND... Erasing Nand... Erasing at 0x20000 -- 100% complete. Writing to Nand... done MANGO64 # save Saving Environment to NAND... Erasing Nand... Erasing at 0x20000 -- 100% complete. Writing to Nand... done MANGO64 # boot |
- 아래와 같은 부팅로그가 출력됩니다.
U-Boot 1.3.4 (Sep 19 2011 - 01:21:21) for MANGO64 uboot-1.3.4-pooh11
CPU: S3C6410@532MHz
Fclk = 532MHz, Hclk = 133MHz, Pclk = 66MHz, Serial = CLKUART (SYNC Mode)
Board: MANGO64
DRAM: 128 MB
Flash: 0 kB
NAND: 256 MB
In: serial
Out: serial
Err: serial
Hit any key to stop autoboot: 3 2 1 3145728 bytes read: OK
Boot with zImage
Starting kernel ...
Uncompressing Linux............................................................................................................................................................................................................. done, booting the kernel.
Linux version 2.6.29 (kra@ubuntu) (gcc version 4.2.2) #70 Fri Jan 6 13:55:23 GMT 2012
CPU: ARMv6-compatible processor [410fb766] revision 6 (ARMv7), cr=00c5387f
CPU: VIPT nonaliasing data cache, VIPT nonaliasing instruction cache
Machine: MANGO6410
Ignoring unrecognised tag 0x41001099
Memory policy: ECC disabled, Data cache writeback
CPU S3C6410 (id 0x36410101)
S3C24XX Clocks, (c) 2004 Simtec Electronics
S3C64XX: PLL settings, A=532000000, M=532000000, E=24000000
S3C64XX: HCLKx2=266000000, HCLK=133000000, PCLK=66500000
mout_apll: source is fout_apll (1), rate is 532000000
mout_epll: source is fout_epll (1), rate is 24000000
mout_mpll: source is mpll (1), rate is 532000000
mmc_bus: source is mout_epll (0), rate is 24000000
mmc_bus: source is mout_epll (0), rate is 24000000
mmc_bus: source is mout_epll (0), rate is 24000000
usb-bus-host: source is mout_epll (0), rate is 24000000
uclk1: source is dout_mpll (1), rate is 66500000
spi-bus: source is mout_epll (0), rate is 24000000
spi-bus: source is mout_epll (0), rate is 24000000
audio-bus: source is mout_epll (0), rate is 24000000
audio-bus: source is mout_epll (0), rate is 24000000
irda-bus: source is mout_epll (0), rate is 24000000
s3c64xx: 10485760 bytes SDRAM reserved for fimc at 0x50821000
s3c64xx: 8388608 bytes SDRAM reserved for pp at 0x51221000
s3c64xx: 8388608 bytes SDRAM reserved for tv at 0x51a21000
s3c64xx: 6291456 bytes SDRAM reserved for mfc at 0x52221000
s3c64xx: 4194304 bytes SDRAM reserved for jpeg at 0x52821000
s3c64xx: 1048576 bytes SDRAM reserved for cmm at 0x52c21000
Built 1 zonelists in Zone order, mobility grouping on. Total pages: 32512
Kernel command line: root=/dev/mtdblock2 rootfstype=yaffs2 console=ttySAC1,115200
PID hash table entries: 512 (order: 9, 2048 bytes)
Console: colour dummy device 80x30
console [ttySAC1] enabled
Dentry cache hash table entries: 16384 (order: 4, 65536 bytes)
Inode-cache hash table entries: 8192 (order: 3, 32768 bytes)
allocated 655360 bytes of page_cgroup
please try cgroup_disable=memory option if you don't want
Memory: 128MB = 128MB total
Memory: 83968KB available (5680K code, 1027K data, 524K init)
SLUB: Genslabs=12, HWalign=32, Order=0-3, MinObjects=0, CPUs=1, Nodes=1
Calibrating delay loop... 530.84 BogoMIPS (lpj=2654208)
Mount-cache hash table entries: 512
Initializing cgroup subsys debug
Initializing cgroup subsys ns
Initializing cgroup subsys cpuacct
Initializing cgroup subsys memory
Initializing cgroup subsys devices
Initializing cgroup subsys freezer
CPU: Testing write buffer coherency: ok
net_namespace: 564 bytes
NET: Registered protocol family 16
USB OTG Hardware Initializing
GPIO-150 autorequested
Camera Hardware Initializing
GPIO-165 autorequested
Wifi Hardware Initializing
GPIO-132 autorequested
GPIO-133 autorequested
Bluetooth Hardware Initializing(smartbox)
GPIO-130 autorequested
GPIO-131 autorequested
GPS Hardware Initializing
GPIO-135 autorequested
GPIO-134 autorequested
s3c64xx_dma_init: Registering DMA channels
s3c64xx_dma_init1: registering DMA 0 (c880c100)
s3c64xx_dma_init1: registering DMA 1 (c880c120)
s3c64xx_dma_init1: registering DMA 2 (c880c140)
s3c64xx_dma_init1: registering DMA 3 (c880c160)
s3c64xx_dma_init1: registering DMA 4 (c880c180)
s3c64xx_dma_init1: registering DMA 5 (c880c1a0)
s3c64xx_dma_init1: registering DMA 6 (c880c1c0)
s3c64xx_dma_init1: registering DMA 7 (c880c1e0)
PL080: IRQ 73, at c880c000
s3c64xx_dma_init1: registering DMA 8 (c8810100)
s3c64xx_dma_init1: registering DMA 9 (c8810120)
s3c64xx_dma_init1: registering DMA 10 (c8810140)
s3c64xx_dma_init1: registering DMA 11 (c8810160)
s3c64xx_dma_init1: registering DMA 12 (c8810180)
s3c64xx_dma_init1: registering DMA 13 (c88101a0)
s3c64xx_dma_init1: registering DMA 14 (c88101c0)
s3c64xx_dma_init1: registering DMA 15 (c88101e0)
PL080: IRQ 74, at c8810000
S3C6410: Initialising architecture
bio: create slab <bio-0> at 0
SCSI subsystem initialized
usbcore: registered new interface driver usbfs
usbcore: registered new interface driver hub
usbcore: registered new device driver usb
Bluetooth: Core ver 2.15
NET: Registered protocol family 31
Bluetooth: HCI device and connection manager initialized
Bluetooth: HCI socket layer initialized
cfg80211: Using static regulatory domain info
cfg80211: Regulatory domain: US
(start_freq - end_freq @ bandwidth), (max_antenna_gain, max_eirp)
(2402000 KHz - 2472000 KHz @ 40000 KHz), (600 mBi, 2700 mBm)
(5170000 KHz - 5190000 KHz @ 40000 KHz), (600 mBi, 2300 mBm)
(5190000 KHz - 5210000 KHz @ 40000 KHz), (600 mBi, 2300 mBm)
(5210000 KHz - 5230000 KHz @ 40000 KHz), (600 mBi, 2300 mBm)
(5230000 KHz - 5330000 KHz @ 40000 KHz), (600 mBi, 2300 mBm)
(5735000 KHz - 5835000 KHz @ 40000 KHz), (600 mBi, 3000 mBm)
cfg80211: Calling CRDA for country: US
NET: Registered protocol family 2
IP route cache hash table entries: 1024 (order: 0, 4096 bytes)
TCP established hash table entries: 4096 (order: 3, 32768 bytes)
TCP bind hash table entries: 4096 (order: 4, 81920 bytes)
TCP: Hash tables configured (established 4096 bind 4096)
TCP reno registered
NET: Registered protocol family 1
S3C64XX ADC driver, (c) 2008 Samsung Electronics
S3C64XX ADC driver successfully probed
audit: initializing netlink socket (disabled)
type=2000 audit(0.680:1): initialized
ashmem: initialized
NTFS driver 2.1.29 [Flags: R/W DEBUG].
JFFS2 version 2.2. (NAND) 짤 2001-2006 Red Hat, Inc.
yaffs Dec 5 2011 01:06:05 Installing.
msgmni has been set to 164
alg: No test for stdrng (krng)
io scheduler noop registered
io scheduler anticipatory registered
io scheduler deadline registered
io scheduler cfq registered (default)
GPIO-153 autorequested
GPIO-53 autorequested
S3C_LCD clock got enabled :: 133.000 Mhz
LCD TYPE :: LTE480WV will be initialized
Window[0] - FB1: map_video_memory: clear ff000000:00177000
FB1: map_video_memory: dma=57c00000 cpu=ff000000 size=00177000
Window[0] - FB2: map_video_memory: clear ff0bb800:000bb800
FB2: map_video_memory: dma=57cbb800 cpu=ff0bb800 size=000bb800
Console: switching to colour frame buffer device 100x30
fb0: s3cfb frame buffer device
s3c6400-uart.0: s3c2410_serial0 at MMIO 0x7f005000 (irq = 16) is a S3C6400/10
s3c6400-uart.1: s3c2410_serial1 at MMIO 0x7f005400 (irq = 20) is a S3C6400/10
s3c6400-uart.2: s3c2410_serial2 at MMIO 0x7f005800 (irq = 24) is a S3C6400/10
s3c6400-uart.3: s3c2410_serial3 at MMIO 0x7f005c00 (irq = 28) is a S3C6400/10
brd: module loaded
loop: module loaded
PPP generic driver version 2.4.2
smsc911x: Driver version 2008-10-21.
smsc911x-mdio: probed
eth0: attached PHY driver [Generic PHY] (mii_bus:phy_addr=ffffffff:01, irq=-1)
net eth0: MAC Address: ea:a3:4f:d9:3e:6a
libertas_sdio: Libertas SDIO driver
libertas_sdio: Copyright Pierre Ossman
8686 sdio: sd 8686 driver:[Dec 12 2011,15:37:18]
8686 sdio: Copyright HHCN 2009
console [netcon0] enabled
netconsole: network logging started
Linux video capture interface: v2.00
s3c-fimc: controller 0 registered successfully
s3c-fimc: controller 1 registered successfully
S3C6400 MFC Driver, (c) 2007 Samsung Electronics
S3C6400 MFC Driver, (c) 2007 Samsung Electronics
S3C PostProcessor Driver v3.12, (c) 2009 Samsung Electronics
S3C6410 TV encoder Driver, (c) 2008 Samsung Electronics
S3C6410 TV encoder Driver init OK.
S3C6410 TV scaler Driver, (c) 2008 Samsung Electronics
S3C6410 TV scaler Driver init OK.
S3C Rotator Driver, (c) 2008 Samsung Electronics
s3c_rotator_probe called
s3c_rotator_probe success
S3C JPEG Driver, (c) 2007 Samsung Electronics
s3c_g2d_probe called
s3c_g2d_probe Success
S3C G2D Init : Done
S3C G3D Driver, (c) 2007-2009 Samsung Electronics
s3c_g3d version : 0x1050000
S3C G3D Init : Done
S3C CMM Driver, (c) 2008 Samsung Electronics
Driver 'sd' needs updating - please use bus_type methods
S3C NAND Driver, (c) 2008 Samsung Electronics
S3C NAND Driver is using hardware ECC.
NAND device: Manufacturer ID: 0xec, Chip ID: 0xda (Samsung NAND 256MiB 3,3V 8-bit)
Creating 4 MTD partitions on "NAND 256MiB 3,3V 8-bit":
0x000000000000-0x000000040000 : "Bootloader"
0x000000040000-0x000000400000 : "Kernel"
0x000000400000-0x00000a800000 : "Rootfs"
0x00000a800000-0x000010000000 : "File System"
ohci_hcd: USB 1.1 'Open' Host Controller (OHCI) Driver
s3c2410-ohci s3c2410-ohci: S3C24XX OHCI
s3c2410-ohci s3c2410-ohci: new USB bus registered, assigned bus number 1
s3c2410-ohci s3c2410-ohci: irq 79, io mem 0x74300000
usb usb1: configuration #1 chosen from 1 choice
hub 1-0:1.0: USB hub found
hub 1-0:1.0: 2 ports detected
Initializing USB Mass Storage driver...
usbcore: registered new interface driver usb-storage
USB Mass Storage support registered.
s3c-udc : S3C HS USB OTG Device Driver, (c) 2008-2009 Samsung Electronics
s3c-udc : version 15 March 2009 (DMA Mode)
android adb driver
Registered gadget driver 'android_adb'
mice: PS/2 mouse device common for all mice
input: mango64-keypad as /devices/virtual/input/input0
Mango64 dev board keypad driver initialized!!
S3C Touchscreen driver, (c) 2008 Samsung Electronics
S3C TouchScreen got loaded successfully : 12 bits
input: S3C TouchScreen as /devices/virtual/input/input1
S3C24XX RTC, (c) 2004,2006 Simtec Electronics
s3c2410-rtc s3c2410-rtc: rtc disabled, re-enabling
s3c2410-rtc s3c2410-rtc: rtc core: registered s3c as rtc0
i2c /dev entries driver
s3c2440-i2c s3c2440-i2c.0: slave address 0x10
s3c2440-i2c s3c2440-i2c.0: bus frequency set to 377 KHz
parent clock for camera: 266.000 MHz, divisor: 9
s3c2440-i2c s3c2440-i2c.0: i2c-0: S3C I2C adapter
s3c2440-i2c s3c2440-i2c.1: slave address 0x10
s3c2440-i2c s3c2440-i2c.1: bus frequency set to 377 KHz
parent clock for camera: 266.000 MHz, divisor: 9
s3c2440-i2c s3c2440-i2c.1: i2c-1: S3C I2C adapter
S3C2410 Watchdog Timer, (c) 2004 Simtec Electronics
s3c2410-wdt s3c2410-wdt: watchdog inactive, reset disabled, irq enabled
Bluetooth: Virtual HCI driver ver 1.2
Bluetooth: HCI UART driver ver 2.2
Bluetooth: HCI H4 protocol initialized
Bluetooth: HCI BCSP protocol initialized
Bluetooth: HCILL protocol initialized
sdhci: Secure Digital Host Controller Interface driver
sdhci: Copyright(c) Pierre Ossman
s3c-sdhci s3c-sdhci.0: clock source 0: hsmmc (133000000 Hz)
s3c-sdhci s3c-sdhci.0: clock source 1: hsmmc (133000000 Hz)
s3c-sdhci s3c-sdhci.0: clock source 2: mmc_bus (24000000 Hz)
mmc0: SDHCI controller on samsung-hsmmc [s3c-sdhci.0] using ADMA
s3c-sdhci s3c-sdhci.1: clock source 0: hsmmc (133000000 Hz)
s3c-sdhci s3c-sdhci.1: clock source 1: hsmmc (133000000 Hz)
s3c-sdhci s3c-sdhci.1: clock source 2: mmc_bus (24000000 Hz)
mmc1: SDHCI controller on samsung-hsmmc [s3c-sdhci.1] using ADMA
usbcore: registered new interface driver usbhid
usbhid: v2.6:USB HID core driver
logger: created 64K log 'log_main'
logger: created 256K log 'log_events'
logger: created 64K log 'log_radio'
gps power driver
smb380 driver init
Advanced Linux Sound Architecture Driver Version 1.0.18a.
WM8960 I2C Codec 0-001a: No platform data supplied
mmc0: new SDIO card at address 0001
libertas_sdio mmc0:0001:1: firmware: using built-in firmware sd8686_helper.bin
libertas_sdio mmc0:0001:1: firmware: using built-in firmware sd8686.bin
libertas: 00:50:43:02:fe:01, fw 9.70.3p24, cap 0x0000030b
eth1 (libertas_sdio): not using net_device_ops yet
libertas: PREP_CMD: command 0x00a3 failed: 2
libertas: PREP_CMD: command 0x00a3 failed: 2
libertas: eth1: Marvell WLAN 802.11 adapter
532----WM8960_ADDCTL2: 0x0
mmc1: new high speed SDHC card at address 0001
mmcblk0: mmc1:0001 00000 7.60 GiB
mmcblk0:<7>mmc1: starting CMD18 arg 00000000 flags 000000b5
532----WM8960_ADDCTL2: 0x60
532----WM8960_ADDCTL3: 0x0
p1
532----WM8960_ADDCTL3: 0x8
532----WM8960_IFACE2: 0x0
532----WM8960_IFACE2: 0x40
532----WM8960_LOUT1: 0x100
532----WM8960_LOUT1: 0x17F
532----WM8960_ROUT1: 0x100
532----WM8960_ROUT1: 0x17F
WM8960_LOUT2: 0x17F
WM8960_ROUT2: 0x17F
WM8960_POWER2: 0xFF
WM8960_CLASSD1: 0xF7
WM8960_CLASSD3: 0xAD
before snd_soc_register_codec()
----WM8960_RINVOL (0x1): 0x197
----WM8960_LOUT1 (0x2): 0x17F
----WM8960_ROUT1 (0x3): 0x17F
----WM8960_CLOCK1 (0x4): 0x0
----WM8960_DACCTL1 (0x5): 0x8
----WM8960_DACCTL2 (0x6): 0x0
----WM8960_IFACE1 (0x7): 0xA
----WM8960_CLOCK2 (0x8): 0x1C0
----WM8960_IFACE2 (0x9): 0x40
----WM8960_LDAC (0xA): 0x1FF
----WM8960_RDAC (0xB): 0x1FF
----WM8960_RESET (0xF): 0x0
----WM8960_3D (0x10): 0x0
----WM8960_ALC1 (0x11): 0x7B
----WM8960_ALC2 (0x12): 0x100
----WM8960_ALC3 (0x13): 0x32
----WM8960_NOISEG (0x14): 0x0
----WM8960_LADC (0x15): 0x1C3
----WM8960_RADC (0x16): 0x1C3
----WM8960_ADDCTL1 (0x17): 0x1C0
----WM8960_ADDCTL2 (0x18): 0x60
----WM8960_POWER1 (0x19): 0x140
----WM8960_POWER2 (0x1A): 0xFF
----WM8960_ADDCTL3 (0x1B): 0x8
----WM8960_APOP1 (0x1C): 0x8
----WM8960_APOP2 (0x1D): 0x0
----WM8960_LINPATH (0x20): 0x100
----WM8960_RINPATH (0x21): 0x100
----WM8960_LOUTMIX (0x22): 0x50
----WM8960_ROUTMIX (0x25): 0x50
----WM8960_MONOMIX1(0x26): 0x0
----WM8960_MONOMIX2(0x27): 0x0
----WM8960_LOUT2 (0x28): 0x17F
----WM8960_ROUT2 (0x29): 0x17F
----WM8960_MONO (0x2A): 0x40
----WM8960_INBMIX1 (0x2B): 0x0
----WM8960_INBMIX2 (0x2C): 0x0
----WM8960_BYPASS1 (0x2D): 0x50
----WM8960_BYPASS2 (0x2E): 0x50
----WM8960_POWER3 (0x2F): 0x0
----WM8960_ADDCTL4 (0x30): 0x2
----WM8960_CLASSD1 (0x31): 0xF7
----WM8960_CLASSD3 (0x33): 0xAD
----WM8960_PLL1 (0x34): 0x8
----WM8960_PLL2 (0x35): 0x31
----WM8960_PLL3 (0x36): 0x26
----WM8960_PLL4 (0x37): 0xE9
No device for DAI s3c64xx-i2s
soc-audio soc-audio.0: RXEN: Invalid MODE in IISMOD
WM8960 Audio Codec TEST
asoc: WM8960 <-> s3c64xx-i2s mapping ok
WM8960_probe() : LOUT2, ROUT2, setting 0x07f
ALSA device list:
#0: smdk6410 (WM8960)
oprofile: using arm/armv6
TCP cubic registered
NET: Registered protocol family 17
NET: Registered protocol family 15
Bluetooth: L2CAP ver 2.13
Bluetooth: L2CAP socket layer initialized
Bluetooth: SCO (Voice Link) ver 0.6
Bluetooth: SCO socket layer initialized
Bluetooth: RFCOMM socket layer initialized
Bluetooth: RFCOMM TTY layer initialized
Bluetooth: RFCOMM ver 1.11
Bluetooth: BNEP (Ethernet Emulation) ver 1.3
Bluetooth: BNEP filters: protocol multicast
Bluetooth: HIDP (Human Interface Emulation) ver 1.2
RPC: Registered udp transport module.
RPC: Registered tcp transport module.
lib80211: common routines for IEEE802.11 drivers
VFP support v0.3: implementor 41 architecture 1 part 20 variant b rev 5
s3c2410-rtc s3c2410-rtc: setting system clock to 2012-03-26 19:55:40 UTC (1332791740)
yaffs: dev is 32505858 name is "mtdblock2"
yaffs: passed flags ""
yaffs: Attempting MTD mount on 31.2, "mtdblock2"
yaffs: restored from checkpoint
yaffs_read_super: isCheckpointed 1
VFS: Mounted root (yaffs2 filesystem) on device 31:2.
Freeing init memory: 524K
INIT: version 2.88 booting
System initialization...
Hostname : MANGO64_S
Filesystem : v1.0.0
Kernel release : Linux 2.6.29
Kernel version : #70 Fri Jan 6 13:55:23 GMT 2012
Mounting /proc : [SUCCESS]
Mounting /sys : [SUCCESS]
Mounting /dev : [SUCCESS]
Mounting /dev/pts : [SUCCESS]
Enabling hot-plug : [SUCCESS]
Populating /dev : [SUCCESS]
Mounting other filesystems : [SUCCESS]
Starting telnetd :
System initialization complete.
GPL(13)=1
m64led_init(), 0x64 -> 1
INIT - ADCCON
m64led device initialized.
EXT2-fs warning: mounting unchecked fs, running e2fsck is recommended
INIT: Entering runlevel: 3
MANGO64_S login: root
login[1134]: root login on 'console'
root@MANGO64_S:~# pwd
/root
root@MANGO64_S:~# mout nt
rootfs on / type rootfs (rw)
/dev/root on / type yaffs2 (rw)
/proc on /proc type proc (rw)
sysfs on /sys type sysfs (rw)
mdev on /dev type tmpfs (rw)
devpts on /dev/pts type devpts (rw,mode=600,ptmxmode=000)
/dev/mmcblk0p1 on /mnt/sdmemory type ext2 (rw,errors=continue)
root@MANGO64_S:~#
- /etc/profile 파일의 내용은 아래와 같습니다.
|
root@MANGO64_S:/etc# cat profile # /etc/profile: system-wide .profile file for the Bourne shell (sh(1)) # and Bourne compatible shells (bash(1), ksh(1), ash(1), ...).
PATH="/usr/local/bin:/usr/bin:/bin" EDITOR="/bin/vi" # needed for packages like cron
export DISPLAY=:0
test -z "$TERM" && TERM="vt100" # Basic terminal capab. For screen etc.
if [ ! -e /etc/localtime ]; then TZ="UTC" # Time Zone. Look at http://theory.uwinnipeg.ca/gnu/glibc/libc_303.html # for an explanation of how to set this to your local timezone. export TZ fi
if [ "`id -u`" -eq 0 ]; then PATH=$PATH:/usr/local/sbin:/usr/sbin:/sbin: fi if [ "$PS1" ]; then # works for bash and ash (no other shells known to be in use here) PS1='\u@\h:\w\$ ' fi
if [ -d /etc/profile.d ]; then for i in /etc/profile.d/*.sh; do if [ -r $i ]; then . $i fi done unset i fi
#PATH=/usr/local/Trolltech/QtopiaCore-4.3.5/bin:$PATH PATH=/usr/local/qt/bin:$PATH export PATH PS1 OPIEDIR QPEDIR QTDIR EDITOR TERM
#QWS_DISPLAY="LinuxFb:mmWidth106:mmHeight66:0" QWS_DISPLAY="LinuxFb:mmWidth136:mmHeight96:0" export QWS_DISPLAY export QWS_MOUSE_PROTO=tslib:/dev/input/event1
umask 022
# tslib option export TSDIR=/usr/local/tslib export LD_LIBRARY_PATH=$TSDIR/lib:$LD_LIBRARY_PATH export TSLIB_TSDEVICE=/dev/input/event1 export TSLIB_CONFFILE=$TSDIR/etc/ts.conf export TSLIB_CALIBFILE=/etc/pointercal
export env TZ=GMT-09:00:00
|
/etc/rc.d/rc.sysinit 파일내용은 아래와 같습니다.
> 아래에서 mount -t vfat ... 부분이 있는데 "-t vfat " 부분을 제거해줍니다. 그러면 SD memory가 마운트 됩니다.
초기 sd memory 를 fat 방식으로 해서 생긴 문제입니다.
|
root@MANGO64_S:/etc/rc.d# cat rc.sysinit #!/bin/sh # --------------------------------------------- # Common settings # --------------------------------------------- HOSTNAME=MANGO64_S VERSION=1.0.0
hostname $HOSTNAME
# --------------------------------------------- # Prints execution status. # # arg1 : Execution status # arg2 : Continue (0) or Abort (1) on error # --------------------------------------------- status () { if [ $1 -eq 0 ] ; then echo "[SUCCESS]" else echo "[FAILED]"
if [ $2 -eq 1 ] ; then echo "... System init aborted." exit 1 fi fi }
# --------------------------------------------- # Get verbose # --------------------------------------------- echo "" echo " System initialization..." echo "" echo " Hostname : $HOSTNAME" echo " Filesystem : v$VERSION" echo "" echo "" echo " Kernel release : `uname -s` `uname -r`" echo " Kernel version : `uname -v`" echo ""
# --------------------------------------------- # MDEV Support # (Requires sysfs support in the kernel) # --------------------------------------------- echo -n " Mounting /proc : " mount -n -t proc /proc /proc status $? 1
echo -n " Mounting /sys : " mount -n -t sysfs sysfs /sys status $? 1
echo -n " Mounting /dev : " mount -n -t tmpfs mdev /dev status $? 1
echo -n " Mounting /dev/pts : " mkdir /dev/pts mount -t devpts devpts /dev/pts status $? 1
echo -n " Enabling hot-plug : " echo "/sbin/mdev" > /proc/sys/kernel/hotplug status $? 0
echo -n " Populating /dev : " mkdir /dev/input mkdir /dev/snd
mdev -s status $? 0
# --------------------------------------------- # Mount the default file systems # --------------------------------------------- echo -n " Mounting other filesystems : " mount -a status $? 0
# --------------------------------------------- # Set PATH # --------------------------------------------- export PATH=/bin:/sbin:/usr/bin:/usr/sbin:/usr/local/bin
echo -n " Starting telnetd : " /usr/sbin/telnetd
# --------------------------------------------- # Done! # --------------------------------------------- echo "" echo "System initialization complete."
# custom device initialization mknod /dev/input/event0 c 13 64 mknod /dev/input/event1 c 13 65
mknod /dev/m64led c 248 249 insmod /qt-demos/m64led.ko echo "" echo "m64led device initialized." #mount -t vfat /dev/mmcblk0p1 /mnt/sdmemory/ mount /dev/mmcblk0p1 /mnt/sdmemory/ echo "sd memory is mounted as /mnt/sdmemory"
|
- /root/.profile 파일을 수정해줍니다. (명령어 입력모드에서 ll 이나 h 만 입력해도 되게 됩니다.
|
root@MANGO64_S:~# cat .profile |
4. 터치스크린 컴파일
- 아래의 폴더에서 make 를 실행해줍니다.
| kra@ubuntu:~$ cd 04.tslib kra@ubuntu:~/04.tslib$ ls kra@ubuntu:~/04.tslib$ cat compile-tslib.sh #git clone http://github.com/kergoth/tslib.git #How to get tslib source #svn co svn://svn.berlios.de/tslib/trunk/tslib tslib # 1.--- ./autogen.sh # compile for arm cpu ./configure --host=arm-none-linux-gnueabi --prefix=/usr/local/tslib --enable-static --enable-shared --disable-h3600 --disable-corgi --disable-collie run sudo chmod -R 777 /usr/local/tslib make make install |
5. qt4.7 컴파일 방법
- 아래의 폴더에서 make 를 실행해줍니다., tslib 는 /usr/local/tslib 에 있는 파일을 사용합니다.
kra@ubuntu:~/05.qt4.7$ cat qt4.7-compile.sh # -prefix usr/local/qt is added for compile destination folder ./configure -prefix /opt/qt4.7 -opensource -embedded arm -xplatform qws/linux-arm-g++ -little-endian -release -no-largefile -no-accessibility -no-qt3support -no-webkit -qt-zlib -qt-gif -qt-libpng -no-libmng -qt-libjpeg -no-nis -no-cups -qt-freetype -depths 24 -L -qt-mouse-tslib |
6. sound 컴파일 방법
- 아래의 폴더에서 make 를 실행해줍니다. 아래 파일을 참고해서 컴파일 합니다.
| kra@ubuntu:~/06.sound$ cat alsa-compile.txt |
7. device test 컴파일 방법
- 아래 파일을 참고해서 컴파일 합니다.
| kra@ubuntu:~$ cd 07.mango64-test/ kra@ubuntu:~/07.mango64-test$ cat ./compile_led-test.sh echo "arm-none-linux-gnueabi-gcc led-test.c -o led-test" arm-none-linux-gnueabi-gcc led-test.c -o led-test echo "copy led-test to ~/nfsRoot/RootFS-NEW/qt-demos/ is required" sudo cp led-test ~/nfsroot/RootFS-NEW2/qt-demos/. kra@ubuntu:~/07.mango64-test$ |
'board_android-IoT > Mango64' 카테고리의 다른 글
| MANGO64_u-boot_kernel_RootFs-Qt-PORTING-GUIDE (0) | 2012.04.08 |
|---|---|
| 망고 WiFi/BT 모듈 보드 판매(AP기능지원) (0) | 2012.04.05 |
| uBoot 환경설정 및 사용법 (0) | 2011.11.13 |
| Qt 4.7 Compiler for ARM (0) | 2011.10.25 |
http://knightjbs.springnote.com/pages/5078547
간단한 uBoot 사용 및 환경 설정 방법
1) 현재 환경 설정 검토 및 저장
uBoot에서 현재의 환경 설정을 검토하는 방법과 변경된 환경 설정을 저장하는 명령을 각각 제공하고 있습니다.
환경 설정을 변경 후 변경된 환경 설정을 앞으로 부팅 시에 계속 사용하고 싶다면 아래의 명령을 통하여 환경 설정을 검토 및 저장을 할 수 있습니다.
▣ 현재의 환경 설정 검토
SysLab_MP2530F> printenv
▣ 현재의 환경 설정을 저장
SysLab_MP2530F> saveenv
2) TCP/IP 환경 설정 설정 방법
uBoot에서 Ethernet를 이용하여 소프트웨어를 타깃보드로 다운로드 하기 위해서는 우선 IP 주소의 환경 설정이 필요합니다. IP 주소를 변경하는 방법은 다음과 같습니다.
▣ IP 주소 설정
SysLab_MP2530F> setenv ipaddr [ IP 주소 ]
▣ Subnet-Mask 설정
SysLab_MP2530F> setenv netmask [ Subnet-Mask ]
▣ 게이트웨이 설정
SysLab_MP2530F> setenv gatewayip [ 게이트웨이 주소 ]
▣ 호스트 시스템(소프트웨어 다운로드 서버)의 IP 주소 변경
SysLab_MP2530F> setenv serverip [ 호스트 시스템 IP 주소 ]
3) TFTP를 이용한 파일 다운로드 방법
TFTP를 이용하여 호스트 PC에 저장된 파일을 타깃 보드로 다운로드 할 수 있습니다.
호스트 PC에서 전송된 파일은 타깃 보드의 메모리 0x0200_0000 번지로 저장됩니다.
SysLab_MP2530F> tftp 02000000 [ 다운로드 파일 이름 ]
4) NAND Flash 관련 명령
uBoot는 NAND Flash 메모리 제어와 관련된 강력하고 다양한 기능들을 제공 합니다. 이를 이용하여, NAND Flash 포멧 및 TFTP를 이용하여 타깃 보드의 메모리에 저장된 파일을 NAND Flash에 기록하는 등의 작업이 가능 합니다.
▣ NAND Flash에서 사용되는 옵셋 개념
NAND Flash에서 사용되는 옵셋은 Byte 용량을 16진수로 변환한 값을 사용 합니다. 예를 들어 256Kbyte 용량을 16진수로 환산하면 0x4_0000 이 됩니다.
그리고 4MByte의 경우 16진수로 환산했을 경우 0x40_0000이 됩니다. 이를 그대로 NAND Flash 명령의 인자 값으로 적용하여 사용 합니다.
▣ NAND Flash 삭제
SysLab_MP2530F> nand erase [ 시작 옵셋 ] [ 삭제 할 크기 ]
예) NAND Flash의 256KByte 지점에서 4MByte의 저장된 데이터를 삭제할 경우
SysLab_MP2530F> nand erase 0x40000 0x400000
▣ NAND Flash 기록
NAND Flash의 기록 명령은 메모리에 저장된 데이터를 NAND Flash로 기록하는 것을 의미 합니다.
따라서, 이 명령어의 인자로는 기록할 데이터가 저장된 메모리 주소와, NAND Flash의 시작 옵셋과 기록할 크기가 들어갑니다. NAND Flash 관련 명령에서 용량 관련 값들은 모두 16진수로 입력합니다.
SysLab_MP2530F> nand write [ 데이터 저장 메모리 주소 ] [ 기록 시작 옵셋 ] [ 기록 크기 ]
예) TFTP로 0x0200_0000 메모리 주소에 저장된 데이터를 NAND Flash의 256KByte 지점에서 4MByte 만큼 데이터를 기록할 경우
SysLab_MP2530F> nand write 02000000 40000 400000
▣ NAND Flash 로우 레벨 포멧
NAND Flash를 공장 초기 값으로 되돌리는 명령으로, NAND Flash에 기록되어있던 잘못된 블록 정보 및 기타 저장 정보들을 모두 삭제 합니다. NAND Flash가 제대로 동작하지 않을 때 사용합니다.
SysLab_MP2530F> nand scrub
5) 리눅스 커널 부트 커맨드 설정
uBoot에서는 리눅스 커널의 부트 커맨드의 설정이 가능합니다. uBoot에서 리눅스의 부트 커맨드를 설정하면, 리눅스 커널은 uBoot에서 설정된 부트 커맨드를 받아와서 부팅을 진행 합니다. 부트 커맨드의 설정 방법은 다음과 같습니다.
SysLab_MP2530F> setenv bootargs [ 커널 부트 커맨드 ]
6) 부팅 자동화 명령 설정
uBoot에서 자동으로 부팅 시 수행할 명령들을 설정할 수 있습니다. 한 개의 명령 또는 다수의 명령이 사용가능하며, 다수의 명령 사용시 명령과 명령과의 구분은 “;”(세미콜론)으로 구분합니다.
SysLab_MP2530F> setenv bootcmd [ 명령 1 ] ; [ 명령 2 ] ; [ 명령 3 ]
7) 적용된 환경 설정으로 부팅 수행
uBoot에서 설정한 환경을 이용하여 부팅하는 명령은 다음과 같습니다.
SysLab_MP2530F> boot
8) SysLab_MP2530F용 환경 설정 예제
다음은 SysLab_MP2530F 모듈용 환경 설정 예제 입니다. uBoot 환경 설정 시 참고하시기 바랍니다.
▣ TFTP 및 NFS를 이용한 부팅 방법
부팅 시 자동으로 TFTP를 이용하여 커널 이미지를 다운로드 받고, 리눅스 커널은 NFS를 이용하여 파일 시스템을 마운트 하여 부팅하는 환경 설정 입니다. 보통 디버깅 용도로 많이 사용됩니다.
SysLab_MP2530F> setenv bootcmd tftp 02000000 uImage-SL2530\;bootm 02000000
SysLab_MP2530F> setenv bootargs mem=64M root=/dev/nfs rw nfsroot=192.168.1.15:/nfsroot/RootFS-SL2530 ip=192.168.1.85:192.168.1.15:192.168.1.1:255.255.255.0::eth0:off console=ttySAC3,115200n81 ethaddr=08:00:3e:26:0a:5b
▣ NAND Flash에서의 부팅 방법
NAND Flash에 저장된 커널 및 루트 파일 시스템을 이용하여 부팅하는 명령 입니다. 호스트 PC의 도움 없이 타깃 보드로 단독 부팅 수행 시에 사용 합니다.
SysLab_MP2530F> setenv bootargs mem=64M root=/dev/mtdblock0 rootfstype=yaffs console=ttySAC3,115200n81 ip=192.168.1.85:192.168.1.15:192.168.1.1:255.255.255.0::eth0:off ethaddr=08:00:3e:26:0a:5b
SysLab_MP2530F> setenv bootcmd nand read 02000000 44000 400000\;bootm 02000000
▣ NAND Flash에 커널 기록
TFTP를 이용하여 호스트 PC로부터 커널 이미지를 다운로드 받아 NAND Flash에 기록하는 명령 입니다.
SysLab_MP2530F> nand erase 44000 400000
SysLab_MP2530F> tftp 02000000 zImage-2530
SysLab_MP2530F> nand write 02000000 44000 $(filesize)
'board_android-IoT > Mango64' 카테고리의 다른 글
| MANGO64_u-boot_kernel_RootFs-Qt-PORTING-GUIDE (0) | 2012.04.08 |
|---|---|
| 망고 WiFi/BT 모듈 보드 판매(AP기능지원) (0) | 2012.04.05 |
| Mango64-linux-Qt-porting (0) | 2012.02.01 |
| Qt 4.7 Compiler for ARM (0) | 2011.10.25 |
http://iggeak.tistory.com/category/QT
위 링크가 원본글입니다.

TRACKBACK | http://iggeak.tistory.com/trackback/42 
'board_android-IoT > Mango64' 카테고리의 다른 글
| MANGO64_u-boot_kernel_RootFs-Qt-PORTING-GUIDE (0) | 2012.04.08 |
|---|---|
| 망고 WiFi/BT 모듈 보드 판매(AP기능지원) (0) | 2012.04.05 |
| Mango64-linux-Qt-porting (0) | 2012.02.01 |
| uBoot 환경설정 및 사용법 (0) | 2011.11.13 |
1. tslib설치에서
./configure --host=arm-none-linux-gnueabi --prefix=/usr/local/tslib --enable-static --enable-shared
저는 위와 같이 조금 다르게 수정해서 컴파일 했습니다. mango64 인데 다르시네요..
/nfsroot/RootFS/etc/profile
- 위 파일에 아래와 같이 입력을 해주면 글자가 좀 커지는 것 같습니다.
QWS_DISPLAY="LinuxFb:mmWidth136:mmHeight96:0"
-> 즉, DISPLAY (LCD의 물리적크기)를 적어주는 것 같습니다.
수고하세요..
mkspecs/qws/linux-arm-g++/qmake.conf 파일을 열어서 다음과 같이 수정한다.
==> 아래와 같은 내용을 추가해줘야 할까요? tslib link할때 에러가 납니다..
(에러내용: libQtGui.so: undefined reference to `ts_read_raw')
QMAKE_LFLAGS += -Wl,-rpath-link=/path/to/tslib/lib
https://bugreports.qt.nokia.com//browse/QTBUG-7855?page=com.atlassian.jira.plugin.system.issuetabpanels%253Aall-tabpanel